 Making probiotic milk at home is very easy if you can get the proper milk. The proper milk is the one that can actually nourish bacteria, so a culture can properly develop. This can be raw milk, or pasteurized milk, but not the ultra pasteurized one, or the UHT. In other words, any milk that turns sour if left at room temperature. I wrote an article about raw milk vs pasteurized, take a look. Well, not entirely true, with a good bacterial culture, you could also turn UHT into yogurt as well, but it’s not going to be the same great yogurt, because UHT treated milk is irreversibly changed during processing.
Yogurt, buttermilk, and kefir are all fermented milk products with probiotic bacteria, the difference is the recipe, and the resulted bacteria cultures in the final product.
Buttermilk
The easiest way to make probiotic milk is to let it ferment. The wild bacteria will naturally turn the milk sour, if you don’t keep it in the fridge, because lactic acid bacteria like the warm temperatures. If you never tried buttermilk, now is the time. Buttermilk tastes great, is easier to digest than fresh milk, and it is very healthy. To make buttermilk, you just warm it up to around 40 – 50 degrees Celsius, put it in a mason jar, or you preferred recipient, and let it ferment for a day or two, depending on the room’s temperature. Wrap the fermenting jars with towels, or anything else to insulate the jars, or just put the jar in the microwave oven, and close it. This will help maintain the jar warm longer. You can also throw in a warm gelp pack.
 You will see the milk turning thick, and it will be a little sour. If it’s not sour, let it ferment a little more. If after three days it doesn’t turn sour, you must have used ultra pasteurized milk. The best is the raw milk. Bacteria will kill all possible pathogens during fermentation, but if you are concerned, you can pasteurize the milk before fermenting it. The buttermilk obtained this way contains a diverse culture of bacteria, but if you would like to make the tastier version, you can select the cultures through a sequence of consecutive fermentations.
- Start with a cup of raw milk, and let it ferment at room temperature until it clabbers, a few days.
- Add a quarter of the clabbered milk in a pint mason jar, and fill it up with fresh milk, (raw or pasteurized), stir to mix, and cover. Let it ferment for 2-3 days until it has clabbered.
- Discard the extra fermented milk.
- Repeat the procedure a few times, until the milk clabbers in 24 to 36 hours.
- Taste it to confirm that it is tart and thick. If the cultured milk is bitter, or it has weird flavors, repeat the fermentation until the flavor disappears.
- When you have the perfect starter culture, add 6 ounces of the starter, in a quart mason jar, and fill up with fresh milk.
- When you use raw milk, skim the cream off of the top, this is a different fermented milk product, with its own bacteria, different from the buttermilk. Buttermilk is more like yogurt, the cream cap is more like sourcream.
- Don’t forget to put it in the fridge once the fermentation is complete.
I usually go with the short version, because it’s faster to make, and most of the times it’s perfect from the first batch. Occasionally you can have a whole batch ruined, so the long version is safer. My approach is to make a small batch, for one full family serving, and to keep a little for the next batch.
Yogurt
 Yogurt is just a variant of sour milk, but the fermentation process is controlled by using special cultures to obtain a certain taste, or to stimulate the growth of specific bacteria. Lactobacillus bulgaricus is the most famous probiotic strain. If you want to make your own yogurt, you just need the starter, and the good milk. The starter can be any yogurt that you like, or you know has good bacteria for you. Just warm up the milk at around 40 – 45 degrees Celsius, add the starter, and stir thoroughly, so the starter gets mixed in properly. Cover the recipient and let it for about a day at room temperature. If you let it ferment more, it will be thicker, and more sour. Good starters will result in a dense yogurt, (thicker than sour milk).
I prefer to make my yogurt plain, and add flavors and sweeteners when the yogurt is already fermented. To be honest, I prefer yogurt plain, but that is cultural, back in the Eastern Europe yogurt used to be plain, when I grew up, I only heard of flavored yogurt as a teenager. I now add a bit of honey sometimes to my yogurt. All the recipes here are for plain yogurt, that is the healthiest one.
Kefir
Kefir is just another type of cultured milk product, just as yogurt. Kefir just uses a different starter, hence the beneficial bacteria are different in the end result. The preparation method it’s similar. Kefir has much more beneficial bacteria strains than yogurt, or sour milk, thus it is healthier. Kefir grains are a complex combination of beneficial yeasts and bacteria, hence a much more effective probiotic food. Kefir milk can also be successfully used as a starter for yogurt.

How To Make Yogurt at Home
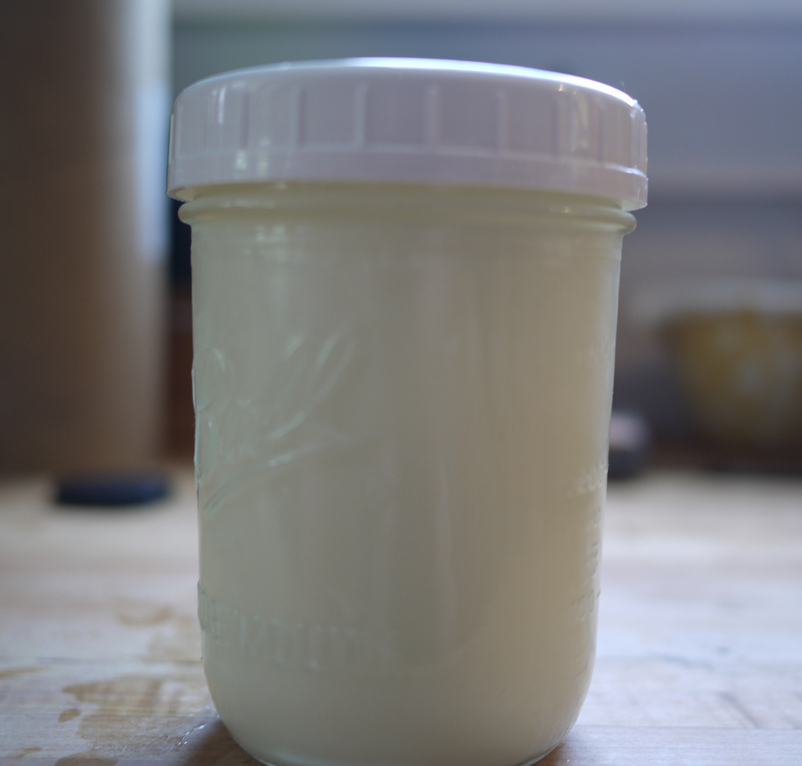
Probiotic Milk Drink
It is very easy to make yogurt at home. You only need a jar, or a ceramic pot, a few spoons of a probiotic yogurt, or kefir, that you can buy at the store, mil, and some towels. Oh, and a warm room environment, this is very important.

First, you need to warm up your milk to around body temperature or just a bit higher. Best temperatures for lactobacillus, the one we are interested in to grow, are between 72 °F(about 22 °C) and110 °F(44 °C). More information about bacteria and fermentation temperatures here:http://www.fao.org/. If you warm it up too much, let it cool off, so you don’t kill the bacteria in the starter. One easy way to test the temperature, if you don’t have a thermometer, is to test it with your finger. Make sure your hands are clean before testing. The milk should be at body’s temperature.
Add a little of the warm milk in your starter, and stir in, mixing thoroughly. When this becomes a liquid, pour both your starter, and the milk into your jar, and stir a couple of times more. The starter can be a little yogurt, commercially bought, or from a previous batch of yours, or just a starter you buy packaged. The commercially sold starter is the best solution, because it only contains specific bacteria, which helps controlling the fermentation.
At this point you need to maintain a constant temperature for your yogurt, which should be easy enough in the summer time. Just wrap your jar in a few towels, then a plastic bag that you close tightly, so that the air stays in. Take the wrapped jar and place it in the microwave until the next day. You can also use an insulated bag, to maintain a constant temperature. If it’s really cold in your house, you can also place a heated gel pack in your insulated bag, to help with maintaining the temperature. The fermentation time should be around 8-10 hours, depending on your starter strength, starter quantity, the fresh milk, and the fermentation temperature. If you let it ferment too long, they whey will separate from the curd, and the organoleptic properties will modify. The yogurt is perfectly edible though, unless you keep it at warm more than 24 hours, in which case you can strain it and make cheese. As soon as your yogurt is ready you should put it in the fridge.
 Yogourmet Freeze Dried Yogurt Starter, 1 ounce
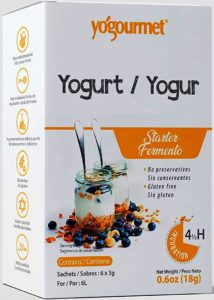
Yogourmet freeze dried yogurt starter is one of the best starters on the market. It is great for making SCD yogurt, and it can be used with both cow’s or goat’s milk and vegetal milk. For vegans, and for lactose intolerant, note that the product contains milk powder, though the milk powder is in a very low quantity.
The starter also contains a little sugar, that’s what makes the starter more efficient, and it is not a concern for diabetics, because of the very low dose.
The starter contains Lactobacillus Bulgaricus, Streptococcus Thermophilus, Lactobacillus Acidophilus, for a perfect balance of probiotics, and for a great tasty yogurt.
The best Milk for Yogurt Making
The best milk for yogurt making is the one that turns into buttermilk without any starter. The higher the pasteurization temperature at the milk packaging facility, the lower the yogurt quality. In other words, avoid, if possible UHT milk. If you can, buy raw milk, which you pasteurize at home. This way you know the milk is not overheated during the packaging process. Some people use raw milk for yogurt making, and raw milk is extremely healthy, compared to pasteurized milk, and the yogurt made with raw milk is ridiculously good and thick. However, drinking raw milk carries serious infection risks, the most common pathogens in raw milk being: Listeria, Salmonella, and E. coli. More about raw milk risks here. I bought a few milk types, and I let them “spoil” in a little cup. The ones that fermented the fastest, and were sour, were the ones that I am using now for my yogurt making. There were a couple of tests that turned bitter after a few days at 97 °F, never use that type of milk, it is UHT, and is meant for longer shelf times.
Use A Yogurt Maker
A yogurt maker is probably one of the best investments, if you want to make yogurt at home on a regular basis. The advantage of a yogurt maker is that it maintains a constant temperature for the programmable amount of time, so you are not worried about your insulation around the jar, or sudden changes of temperature in the environment. Here is a comparison between some of the most popular yogurt makers: Yogourmet vs Euro-Cuisine vs Yolife.
 Euro Cuisine YM80 Yogurt Maker
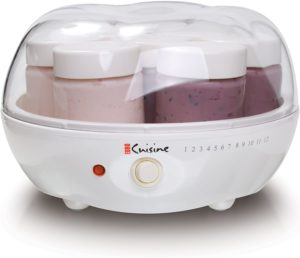
This yogurt maker is an inexpensive device, that will maintain your yogurt batch at the proper temperature, ensuring a proper fermentation. The unit is a basic one, but really, if you want to save money, this is all you need for making your Greek yogurt. The unit includes the heating base, a lid to cover the base, for maintaining proper temperature, features a pilot lamp, and a switch on/off button. It also comes with six glass containers, which are great because glass containers are the best for making yogurt. The unit also has three years warranty, which gives you peace of mind, and you don’t have to worry about the reliability of your yogurt maker.
How To Make Vegan Yogurt
How to Make Coconut Yogurt
Vegan yogurt is just a bit more finicky to get right than milk yogurt. That is because in a non-dairy yogurt, the sugars in coconut or almonds is not the favorite of lactic acid. Their favorite sugar is, you guessed, lactose. There are also a few other factors that could contribute to the thikness and the taste of yogurt. For instance: the protein in milk is different than the one in coconut. Here is the easiest way to make nondairy yogurt:
- Soy milk, is the best vegan milk for yogurt with a thick texture. Buy the soy milk from the store.
- If you are sensitive to soy, or you don’t like the bean taste of soy milk, great alternatives are coconut, oat, almond and hemp milk.
- If you want your yogurt thick, add to the vegan milk some coconut milk powder, it will make a huge difference. I don’t care for thickness, if it’s runny I’ll just drink it. In fact my number one favorite is coconut milk yogurt, because it tastes absolutely divine. Another way to make it thick is ito add some chia seeds after the fermentation ius done, before transfering to the fridge.
- If you are up for the challenge, make your own coconut, or almond milk, in a blender. It allows you to add more consistency to your final result, and your yogurt will be thicker. Again, I don’t care.
- Another way to thicken your yogurt is to add some acacia gum powder in the milk, blend it with an immersion blender, or any blender, before adding the starter cultures. Acacia gum is one of the best thickeners because is also a prebiotic, hence a more healthier fermented drink. (Note, I have the tip from a friend, but I haven’t tested this one.)
- Warm up the milk just under 110 oF, the lower temperatures will allow bacteria to grow better, but it will take longer to fully ferment.
- Add your yogurt starter, according to the packaging instructions, and mix it thoroughly. Once you made your first batch you can keep some for your next one, you don’t have to use the freeze dried starter all the time.
- If you want it done faster, and you don’t care about the amount of probiotics in your yogurt, 110 oF is the best temperature, maintain this temperature for about 6-8 hours, and you’ll get your probiotic vegan milk faster.
- If you want the SCD type of yogurt, dairy or non-dairy, the optimal temperature is around 70 oF, the range is between 65-75 oF, (18-25 oC).
- Once the vegan probiotic milk is fully thickened and it has the specific tart taste, move it in the refrigerator to prevent spoilage.
 Coconut Milk Powder – Thickens Your Vegan Yogurt
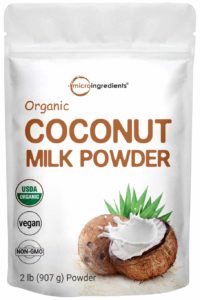
Coconut milk powder is a great way to thicken your vegan yogurt, and get that perfect texture for you home made vegan probiotic milk drink. It tastes great, it’s vegan, and it’s very healthy. This is pure coconut milk powder, no additives such as casein, or maltodextrin.
fermenting Lactaid milk
to make buttermilk–Does this work the same way with lactaid milk?
fermenting Lactaid milk
Mildred,
LactAid is milk with the lactose removed. During fermentation, the lactose transforms into lactic acid, and this is what gives milk the sour taste. I have never tried fermenting LactAid, but I suspect it won’t work, because there are not much carbohydrates in the milk if you remove the lactose. That means the cultures will starve.
Fermenting Lactaid milk
1) Lactose free milk has carbohydrates. The lactose is broken down into its components(glucose and galactose). Culture bacteria will thrive on these carbohydrates. Lactaid brand and other commercial lactose free milks are UHT pasteurized. These milks will make yogurt and sometimes cream cheese, farmers cheese if you use rennet. You can make your own lactose free milk by crushing and then adding lactase tablets (usually 2 to a gallon) and keeping in the fridge for 5-6 days. Shake it every day. this will decrease/eliminate the lactose and yield glucose and galactose.
Ingredient Portion
May i know what’s the ingredient portion used for the making of probiotic drink>
Question
What is a good probiotic powder that I can add to pasteurized cold milk just to help it eat the milk sugar?
Agriculture
globally fitting information